Mastering Digital Design - Learn Digital 3d Sculpting with ZBrush and Mudbox (Part 2)


  • Mastering Digital Design - Learn Digital 3d Sculpting with ZBrush and Mudbox (Part 2), Singapore elarning online course
  • Mastering Digital Design - Learn Digital 3d Sculpting with ZBrush and Mudbox (Part 2), Singapore elarning online course
  • Mastering Digital Design - Learn Digital 3d Sculpting with ZBrush and Mudbox (Part 2), Singapore elarning online course
  • Mastering Digital Design - Learn Digital 3d Sculpting with ZBrush and Mudbox (Part 2), Singapore elarning online course
  • Mastering Digital Design - Learn Digital 3d Sculpting with ZBrush and Mudbox (Part 2), Singapore elarning online course
  • Mastering Digital Design - Learn Digital 3d Sculpting with ZBrush and Mudbox (Part 2), Singapore elarning online course

Course Description

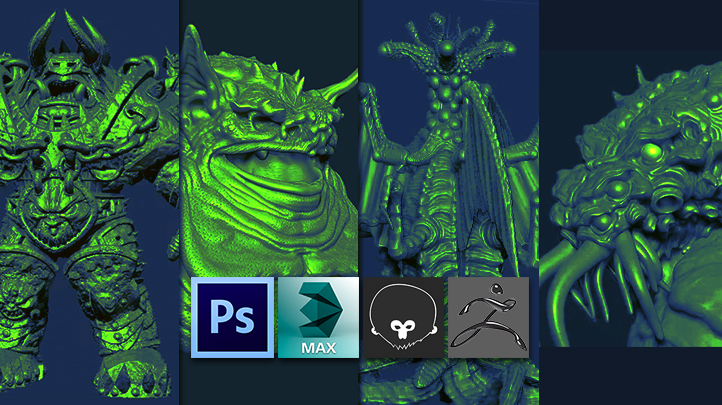
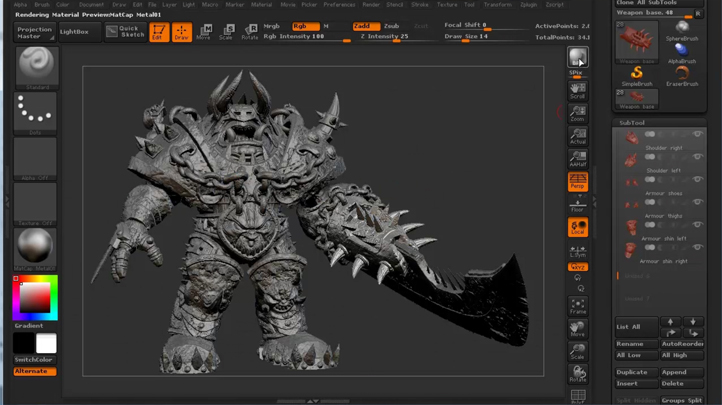
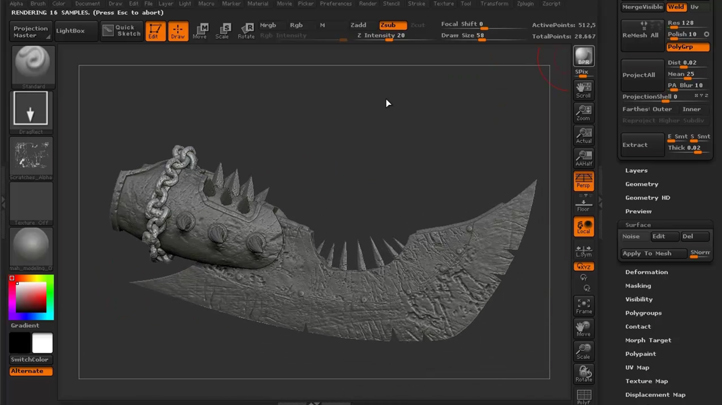
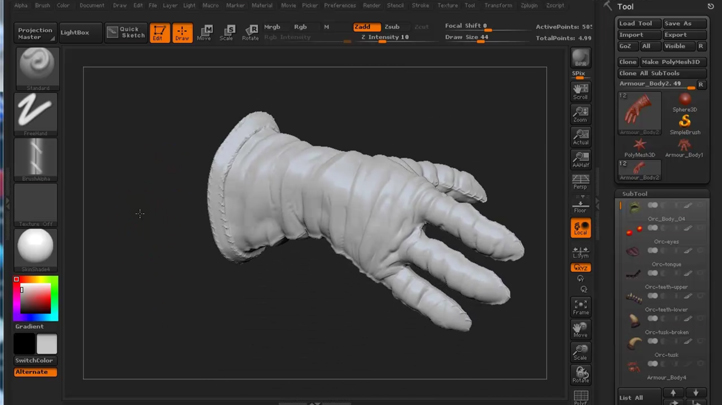
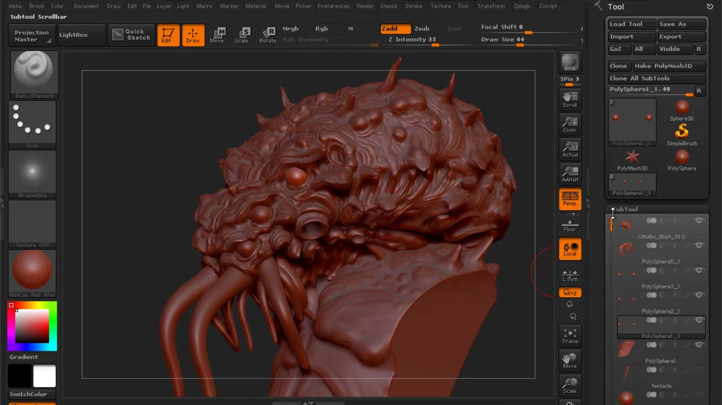
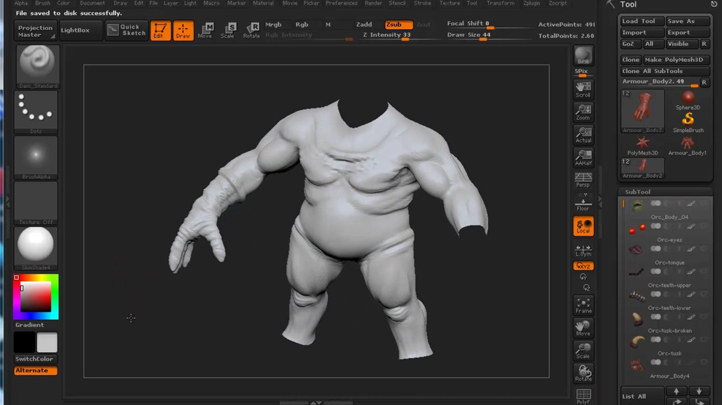
In the second part of Learn Digital 3d Sculpting with ZBrush and Mudbox, instructor Stephen Wells will be walking through the process of finishing his Next Gen Orc character while showing you tons of new tools, tips, and workflow methods used within ZBrush. In this course we jump into the worlds of ZBrush dynamesh sculpting and H.P. Lovecraft at the same time! We then expand our repertoire in creating more detail sculpting by using a variety of brushes, alphas, layers and some finesse to get a final fantastic sculpt of one of Lovecraft's faves: Cthulhu! For this course, we explore Dynamesh sculpting in ZBrush and we're continuing our cosmic entity series by working on Tsathoggua, one of the Old Gods and rival of Cthulhu.

Learn tips and tricks of creating dynamic animation and games design.

- Know about the different branches in animation
- Learn about what goes into making a successful animation
- Understand better about the designing process with this course
- Be able to create your own monsters and creatures at the end of this course


Course Objectives

1. Know about more tools, tips in ZBrush
2. Understand the introduction to ZBrush Dynamesh sculpting
3. Know about the various sculpting details
4. Understand the workflow of completing a good sculpture
5. Be able to sculpt Cthulhu with Dynamesh
6. Be able to work on Tsathoggua as well


Related Courses

  • Mastering Digital Design - Master the Hand-Painted Texturing Style (Part 2)

    Mastering Digital Design - Master the Hand-Painted Texturing Style (Part 2)

    SGD $189.00

    Course Description

    In the second part of Master the Hand-Painted Texturing Style, we will utilize a combination of Maya and Photoshop to take a concept for a stylized weapon and translate that into a fully realized low poly hand painted asset for use within a videogame environment. We'll also take a look at some of the process and techniques used to create the texture map, being sure to replicate the crafted look of the concept. Tools such as clipping masks, Variations and Dilation will be utilized to help keep our texture easy to maintain and looking neat for potential future revisions. Throughout the creation process we'll also touch upon how things relate to a production environment whilst also pointing out any areas which are likely to generate the need for some problem solving. At the end of this course you will be able to create and understand the workflow that I use to create stylized environments like this one.  Learn tips and tricks of creating dynamic animation and games design. - Know about the different branches in animation - Learn about what goes into making a successful animation - Understand better about the designing process with this course - Be able to create your own monsters and creatures at the end of this course

    Read more...

  • Mastering Digital Design - Organic 3d Modeling and Texturing for Games, Architecture, and Film

    Mastering Digital Design - Organic 3d Modeling and Texturing for Games, Architecture, and Film

    SGD $189.00

    Course Description

    When working with organic surfaces such as trees, grass, dirt, wood and stone, the rules and software techniques that professionals use may require a unique approach. This course will cover advanced techniques and software used to create these sort of assets for games. This in-depth course covers everything you need to know about creating foliage! We'll look into how to make realistic looking grass, branches, and a full tree from the ground up. In this course, instructor Emiel Sleegers is going to walk us through the process of learning the SpeedTree to CryEngine pipeline while utilizing Maya as the middle-man 3D package for exporting. Emiel Sleegers will go over on how to make a terrain using both Mudbox and World Machine. Moving on from there, Philipp Schmidt is going to give us an introduction to PixPlant while showing us how to make some basic tileable textures.  Learn tips and tricks of creating dynamic animation and games design. - Know about the different branches in animation - Learn about what goes into making a successful animation - Understand better about the designing process with this course - Be able to create your own monsters and creatures at the end of this course

    Read more...

  • Mastering Digital Design - Learn to Animate Creatures and Characters for Games and Film (Part 2)

    Mastering Digital Design - Learn to Animate Creatures and Characters for Games and Film (Part 2)

    SGD $189.00

    Course Description

    In the second part of Learn to Animate Creatures and Characters for Games and Film, instructor Justin Harrison walks through the process of creating various animations commonly found within a game environment. Instructor Prantik Madhukalya gives us a comprehensive look at his process for animating a non-humanoid creature. After exploring the fundamental needs of basic character locomotion and interaction, we’ll prepare and export our animations to Unreal 4. Upon finishing this two volume series you’ll have a better understanding of the Maya to UE4 animation process, Blueprints, Events and Matinee, pHAT and setting up keyframe to ragdoll execution. We will highlight common pitfalls to avoid that can break your blendshapes, and tips for making your blendshape workflow more efficient and easy to edit.  Learn tips and tricks of creating dynamic animation and games design. - Know about the different branches in animation - Learn about what goes into making a successful animation - Understand better about the designing process with this course - Be able to create your own monsters and creatures at the end of this course

    Read more...


Content

Orc Body in ZBrush - Volume 1

Preview Available

+
Resource Files

Chapter 1 - Introduction

Chapter 2 - Mesh Layout and Uvs

Chapter 3 - ZBrush Polygroups

Chapter 4 - Sculpting the Body 01

Chapter 5 - Sculpting the Body 02

Chapter 6 - Sculpting the Body 03

Chapter 7 - Sculpting the Body 04

Orc Body in ZBrush - Volume 2

+
Resource Files

Chapter 1 - Introduction

Chapter 2 - Polygroups and Subtools

Chapter 3 - Sculpting the Pants

Chapter 4 - Sculpting the Skulls 01

Chapter 5 - Sculpting the Body 02

Chapter 6 - Final Skull Details

Orc Body in ZBrush - Volume 3

+
Resource Files

Chapter 1 - Introduction

Chapter 2 - Sculpting the Belt

Chapter 3 - Sculpting the Crotch Plate

Chapter 4 - Sculpting the Helmet

Chapter 5 - Sculpting the Neck Guard

Chapter 6 - Sculpting the Chains

Chapter 7 - Sculpting the Shoulders 01

Chapter 8 - Sculpting the Shoulders 02

Chapter 9 - Sculpting the Gauntlets

Chapter 10 - Sculpting the Legs 01

Chapter 11 - Sculpting the Legs 02

Chapter 12 - Sculpting the Weapon

Orc Body in ZBrush - Volume 4

+

Chapter 1 - Introduction

Chapter 2 - Polypainting the Body

Chapter 3 - Polypainting the Glove

Chapter 4 - Polypainting the Shorts

Chapter 5 - Polypainting the Skulls

Chapter 6 - Prepping the Armor

Chapter 7 - Polypainting the Helmet

Chapter 8 - Polypainting the Neck Guard

Chapter 9 - Polypainting the Shoulders

Chapter 10 - Polypainting the Crotch Plate

Chapter 11 - Polypainting the Belt

Chapter 12 - Polypainting the Chains

Chapter 13 - Polypainting the Gauntlet

Chapter 14 - Polypainting the Thigh Armor

Chapter 15 - Polypainting the Shoes

Chapter 16 - Polypainting the Shins

Chapter 17 - Finishing the Shoulders

Chapter 18 - Polypainting the Weapon

Resource Files

Orc Body in ZBrush - Volume 5

+
Resource Files

Chapter 1 - Introduction

Chapter 2 - Rendering our Textures

Chapter 3 - Creating the Spec Maps

Chapter 4 - Marmoset Setup

Chapter 5 - Final Render Presentation

Monster Sculpting (Cthulhu) - Volume 1

+

Chapter 1 - Overview for Creating a Dynamesh Bust

Chapter 2 - Intro to ZBrush Dynamesh

Chapter 3 - Creating QuickTentacles

Chapter 4 - Continue Shaping and Adding Eyes

Chapter 5 - Pushing and Pulling Foundation Forms

Chapter 6 - Dynameshing the Torso

Chapter 7 - Using the Clip Curve Brush to Trim the Torso

Chapter 8 - Adding a Tentacle .OBJ to the Scene

Resource Files

Monster Sculpting (Cthulhu) - Volume 2

+

Chapter 1 - Introduction

Chapter 2 - Starting Secondary Shapes and Details

Chapter 3 - Using Dam Standard to Add Age and Wrinkles

Chapter 4 - Adding in Asymmetry Details

Chapter 5 - More Wrinkling and Gills

Chapter 6 - Secondary Detailing on the Torso

Chapter 7 - Finalizing Torso Details and Posing the Tentacles

Chapter 8 - Adding in All Tentacles (Timelapse) and Review

Resource Files

Monster Sculpting (Cthulhu) - Volume 3

+

Chapter 1 - Intro

Chapter 2 - Alphas and Reworking the Big Tentacles

Chapter 3 - Using Alphas on the Torso and Head

Chapter 4 - Using Alphas for Skin Mottling and Wrinkles

Chapter 5 - Adding Nodules and Skin Bump Detailing

Chapter 6 - Finalizing the Larger Tentacles and Gill Slits

Chapter 7 - Sculpting the Eyes of an Octopoid and Review

Resource Files

Monster Sculpting (Tsathoggua) - Volume 1

+

Chapter 1 - Introduction

Chapter 2 - Beginning Dynamesh Sculpting

Chapter 3 - Working on the Torso and Head

Chapter 4 - Importing the Tongue and Reworking It

Chapter 5 - Creating an Arm

Chapter 6 - Tweaking Proportions and Torso Sculpting

Chapter 7 - Further Adjustments and Creating Teeth

Resource Files

Monster Sculpting (Tsathoggua) - Volume 2

+

Chapter 1 - Intro

Chapter 2 - Reproportioning the Model

Chapter 3 - Mouth Work and Layering Wrinkles

Chapter 4 - Tweaking the Ears and Adding Venom Sacs

Chapter 5 - Creating a Custom Alpha and Stomach Work

Chapter 6 - Adding Structures to the Tongue

Chapter 7 - Adding Tentacles for Arms

Resource Files
Resource Files

Monster Sculpting (Tsathoggua) - Volume 3

+

Chapter 1 - Intro

Chapter 2 - Adding New Appendages

Chapter 3 - Tongue Work

Chapter 4 - Creating New Gums

Chapter 5 - Creating Teeth for Gums

Chapter 6 - Creating Secondary and Lower Dentitia

Chapter 7 - Begin Detailing of Grasping Wings

Chapter 8 - Further Detailing of Grasping Wings

Resource Files

Monster Sculpting (Tsathoggua) - Volume 4

+

Chapter 1 - Intro

Chapter 2 - Beginning Final Alpha Detailing of Torso

Chapter 3 - Final Teeth Work

Chapter 4 - Tongue Work and Beginning Details on Wings

Chapter 5 - Finishing the Wings and Adding a Plaque Column

Resource Files

Monster Sculpt (Elder Thing) - Volume 1

+

Chapter 1 - Intro

Chapter 2 - Reference and Base Shapes 01

Chapter 3 - Creating the Eye Stalks

Chapter 4 - Creating the Cilia

Chapter 5 - Shortening the Eye Stalks and Adding Some Shaping

Chapter 6 - Creating the Feeding Tubes

Chapter 7 - Creating the Wings

Resource Files

Monster Sculpt (Elder Thing) - Volume 2

+

Chapter 1 - Intro

Chapter 2 - Secondary Details on Head & Neck

Chapter 3 - Continued Detailing on Head & Neck

Chapter 4 - Begin Secondary Detailing on Body

Chapter 5 -Continued Detailing on Body

Chapter 6 - Adding Details to Body Underside

Chapter 7 - Final Neck Tweaks and Re-proportioning

Resource Files

Monster Sculpt (Elder Thing) - Volume 3

+

Chapter 1 - Intro

Chapter 2 - Creating the Tenticular Foot

Chapter 3 - Finishing Secondary Details on Tenticular Foot

Chapter 4 - Posing the Tentacles

Chapter 5 - Creating the Arm While Changing Direction

Chapter 6 - Finessing the Arm and Adding Fingers

Chapter 7 - Scaling, Posing the Fingers, and Overview

Resource Files

Monster Sculpt (Elder Thing) - Volume 4

+

Chapter 1 - Intro

Chapter 2 - Creating the Eyestalk for IMM Brush

Chapter 3 - Finishing the Eyestalk and Cilia for IMM Brush

Chapter 4 - Creating the Feeding Tube for IMM Brush

Chapter 5 - IMM Brush Tweaks and Using it to Add the Eyestalks

Chapter 6 - Using IMM Brush to Insert the Feeding Tubes

Chapter 7 - Using IMM Brush to Insert the Cilia

Chapter 8 - Creating New Wings

Chapter 9 - Finessing the New Wing, Placing Them, and Review

SGD $189.00
(Price excludes GST)
GET ACCESS NOW
Convince your boss email
This site is best viewed using the latest versions of Google Chrome, Apple Safari, Mozilla FireFox, Microsoft Internet Explorer 11 and Edge which supports HTML5/Webkit technologies.